Preparations (optional): Upload media Filelist
Usually, you might want to have at least one image with your news. Upload those via Filelist, keeping filesizes and aspect ratios in mind.
This is also where captions should be added, as they are attached to the image data set and not to the news record.
You can add as many images as you like, they will be displayed one after the other in a column on the right of the text. The first related media file will be used as header image, which should match the following criterea:
Ideal header image size for News
The typical image size for the first image is 1920 x 1080 pixel (FullHD). You can achieve this by either cropping your image before uploading it or by using the built-in image crop function. The latter method is best if you plan on reusing the image elsewhere on your website.
Either way, using portrait orientation images as a news header results in severe cropping of the image or an extremely tall header image.
You'll find out more about images in news records later in this recipe.
Step 1: Create a News Record List
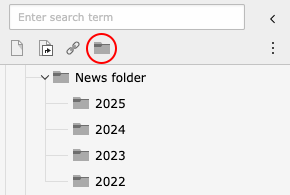
Go to the List module and open the News folder.
It is strongly advised to use subfolders at least per year to keep things tidy. You can add folders by simply draging the folder item on top onto the News folder. Then name the folder as desired.
If your page is multilingual, please add the according translation of the folder.
Open the appropriate subfolder where you want to place your news record.
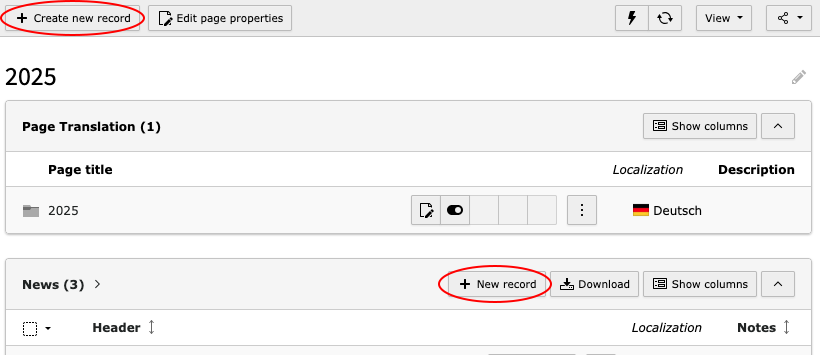
Create a new news record by either clicking on + New record in the News record table or by clicking on + Create new record in the top bar. If you choose the latter path you have to select News in a second step.
Step 2: Fill in the News form List
Fill in the form with your news. In this recipe, we'll only cover the fields usually necessary to publish a message. So if a field is not explained, just leave it as is. Check the News page in the List documentation for an in-depth explanation of each field for additional information.
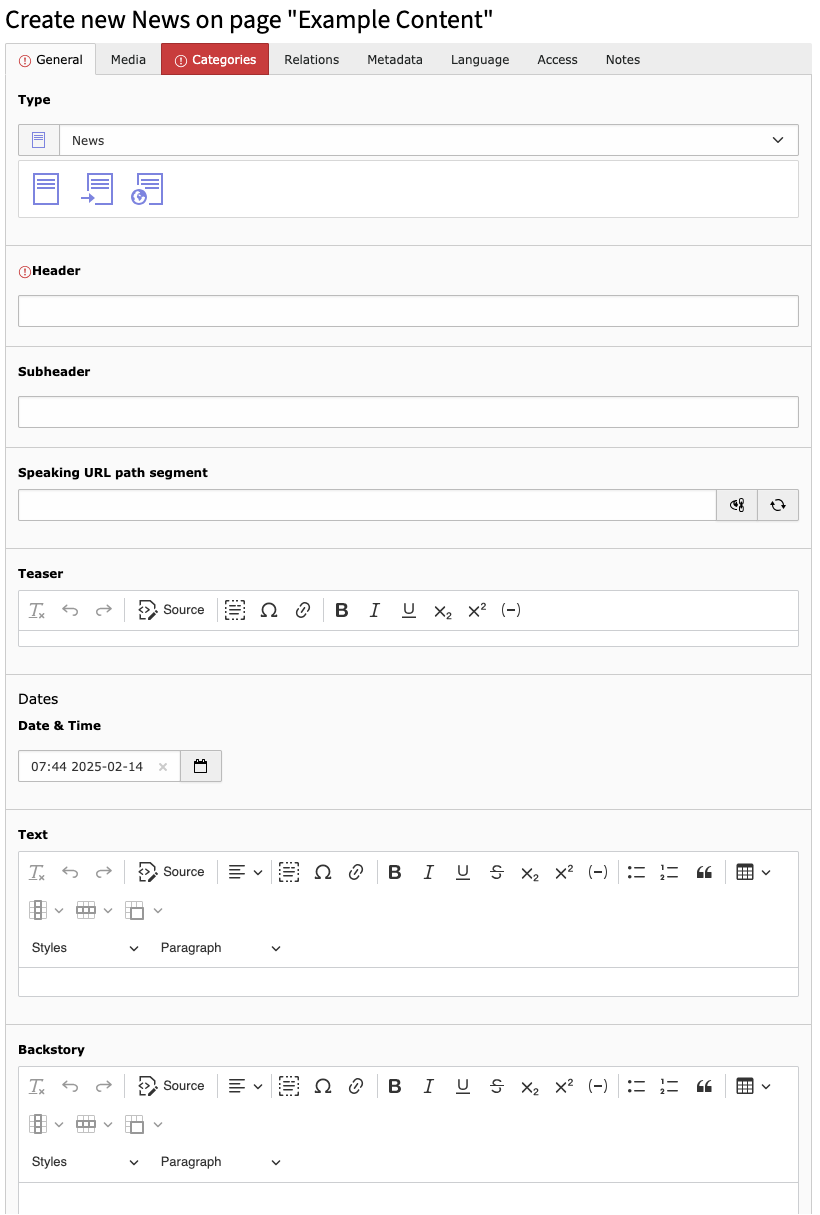
Header and Subheader
The title of your news. If you risk having a lengthy title, see if you could split it in two by also using the subheader to deliver additional information in the element’s title section. The header field is mandatory.
Teaser
The first paragraph of your news release. This will be displayed in a slightly bigger font size and preceed your header image in the article view.
This field also serves as the teaser text in news listings. In those, it will automatically be cropped after about 250 characters, leaving the last word intact and appending it with "…".
Date & Time
This field set itself on the creation date and time of your record. Modify it to backdate your news if desired. The time will not be displayed in the frontend.
Text
The main text body for your news. Please take care not to repeat your teaser paragraph.
Backstory
Use the backstory field to provide additional information that is not directly linked to your news release, for example a brief introduction to a professor or research facility named in the text.
The backstory text will be displaye in a blue font color below the news text.
Step 3: Add media List
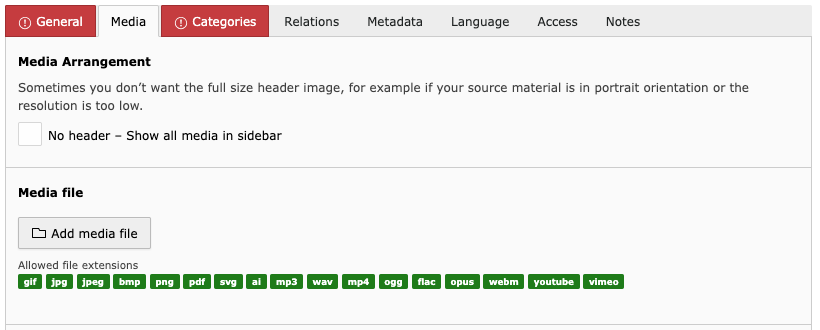
Add your media via the standard image/media relation dialog. In News, this will contain an additional field where you can choose in which views the image should be displayed – you'll usually want to leave this on the default Show in all views, but combined with the media arrangement field, this offers you a variety of image display options.
Media Arrangement
This field now features three options, but in most cases, you'll just leave it on the default value.
- Default
The first media assigned to the article will be used both as a teaser image and as a header image.
- No header media
There will be no header image on the single article view page, all media will be shown in a column right of the content.
The first image or video will still be shown in listings as the teaser image.
- No header and teaser media
There will be no header image on the single article view page, all media will be shown in a column right of the content.
There will also be no teaser image and listing view will fall back to the blue placeholder.
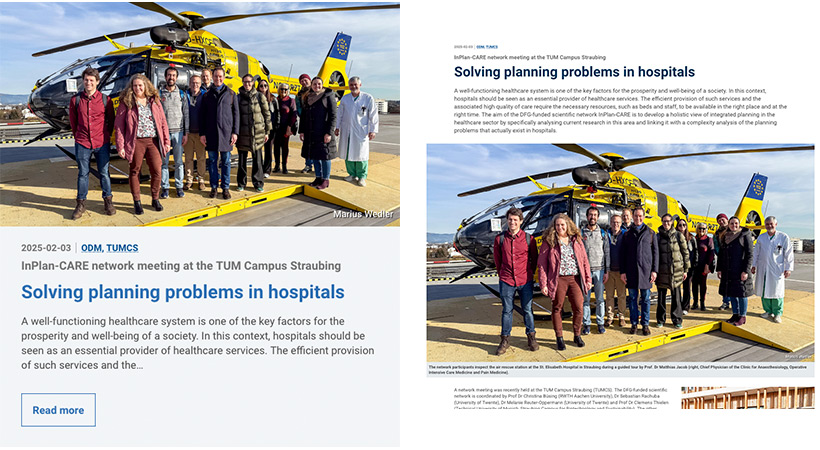
Header image rendering on list and article views
Step 4: Choose Categories List
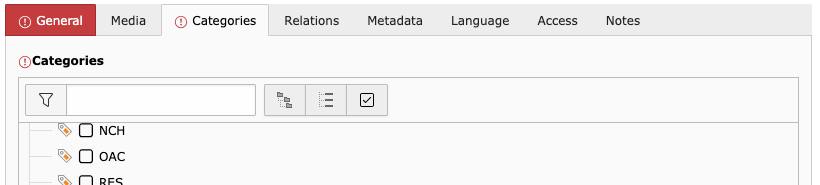
Select your department in the category tree – otherwise it will not be shown on your website!
Save your record.
Step 5 (optional): Create Translation List
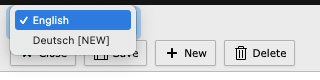
Click on the language selection box at the top of the form, above the Close and Save buttons and choose German [NEW].
Wait for the form to reload and then fill out all the fields you want to translate.
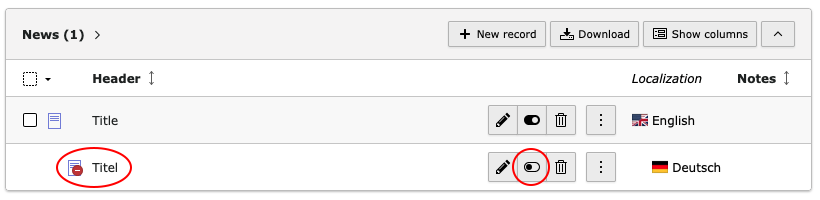
After saving and closing, make sure the translation is activated.