Schritt 1: Foto vorbereiten Auf Ihrem Rechner
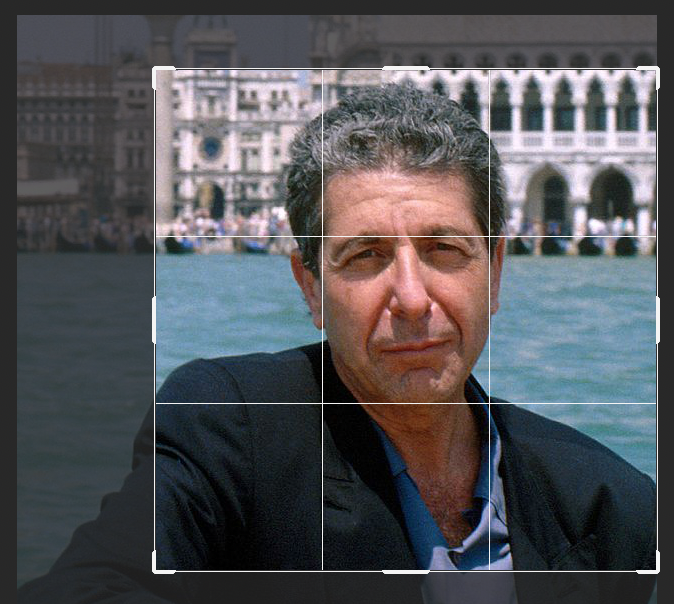
Bereiten Sie das Porträt der Person vor dem Hochladen vor, indem Sie es mit Photoshop, Gimp (verfügbar im TUMPC-Softwarecenter) oder einer anderen Bildbearbeitungssoftware Ihrer Wahl auf die ideale Größe für Personalbilder (600 x 600 Pixel) zuschneiden.
Die 9-Felder-Markierung des Zuschneidewerkzeugs sollte so dimensioniert sein, dass die obere horizontale Linie die Oberkante der Augenbrauen berührt, während die untere Linie auf der Kinnlinie liegt. In der Regel sollten beide vertikalen Linien nun ungefähr zwischen den Ohren und den Wangenknochen liegen.
Step 2: Upload Photograph Filelist
Log in to the website and select Filelist in the sidebar. Go to the personnel directory and upload the image.
Open the image properties and fill in a description and alternative text.
Proceed to the Metadata tab and fill in the Copyright field, if known (Example: Jan Winter/TUM). You can ignore this if the image is from a private source or just put “private” in the field.
Step 3: Create New Personnel Record List
Select List in the Sidebar and browse to the correct personnel record folder, usually Personnel folder > Research Personnel.
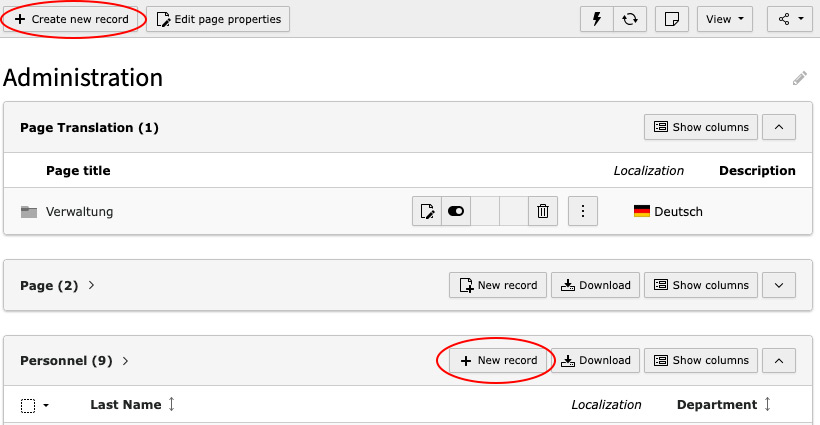
There are two paths to add a new personnel record, either by clicking on + New record in the Personnel table or by clicking on + Create new record in the top bar. If you choose the latter path you have to select Personnel in a second step.
Step 4: Fill in the Personnel Data Form List
Information on the different fields of the form can be found in the Personnel documentation.
Step 5: Add Person on Page Page
This step only applies if you do not use the Automated Personnel Content Element.
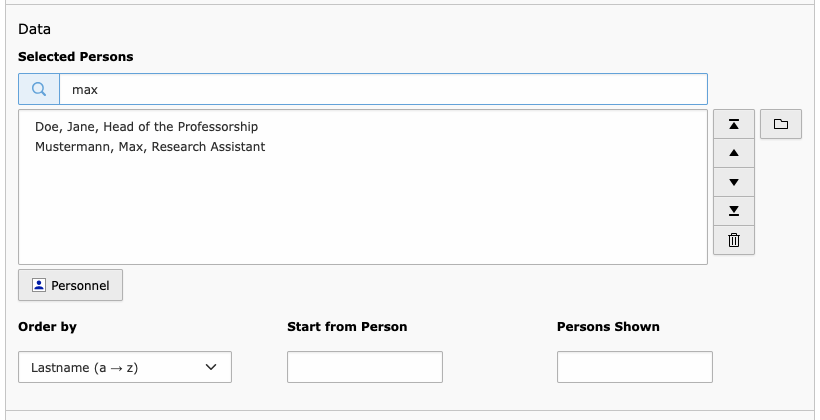
Head over to Page in the Sidebar and open the Personnel: selected Content Element on the page you want the person to appear on.
In the Content Element, scroll down to the Data section and use the search function to add the new person.
Alternatively, you can click on the folder icon on the right or the Personnel button below the box to browse your personnel folders.